
Feast+ Patterns
Feast+ Patterns
Now that you've learned the basics, this section will go over the specific Feast+ patterns available, and how to use them to their fullest potential!
All patterns can be found in the Block Editor > [+] > Patterns > Feast Patterns

Jump to:
Reader Review
In the Block Editor > [+] > Patterns > Feast Patterns > Featured Review Pattern you'll find a pre-defined layout for adding a reader review block.
I got so many compliments from this!!
- optional name of reviewer
Table of Contents
Feast+ styling is automatically applied to the Advanced Jump To block. The style is determined by the style you select under "Advanced Jump To" on the Feast+ Branding page.

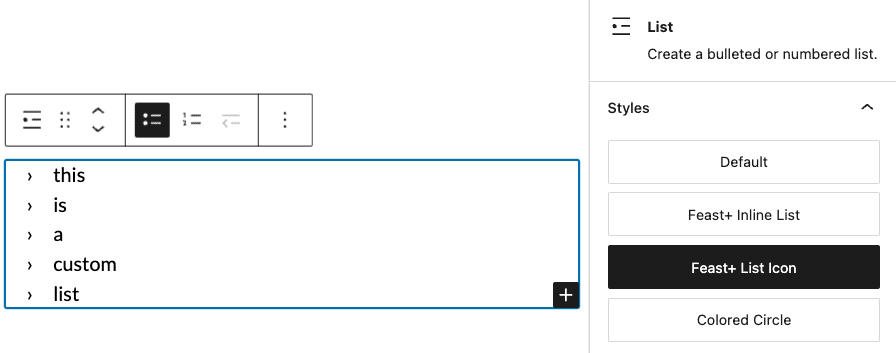
Custom List Styling
The custom list icon that you set in Admin > Feast Plugin > Branding > Custom List Styling:

Gets applied by selecting the Feast+ List Icon style on the list block:
Inline List
Lists can also be transformed into inline lists by selecting the Feast+ Inline List style on the list block:

Note that this is only meant to be used in the flat footer layout (yet to be released).
Colored numbers
On the ordered list block (ie. numbered), you can now apply colored circles to the numbers to improve readability:

See the quick intro video:
A few notes:
- you must select the numbered / ordered list, not unordered list
- this appears in the style tab of the block, which is the half-white-half-black circle
- this does not work with reversed numbers
- list start numbers up to 20 are supported
- you must select the list block, not the individual list item
Instructions Pattern (Numbered)
In the Block Editor > [+] > Patterns > Feast Post Patterns > Instructions Pattern Numbered you'll find a pre-defined layout for adding numbered instruction boxes.
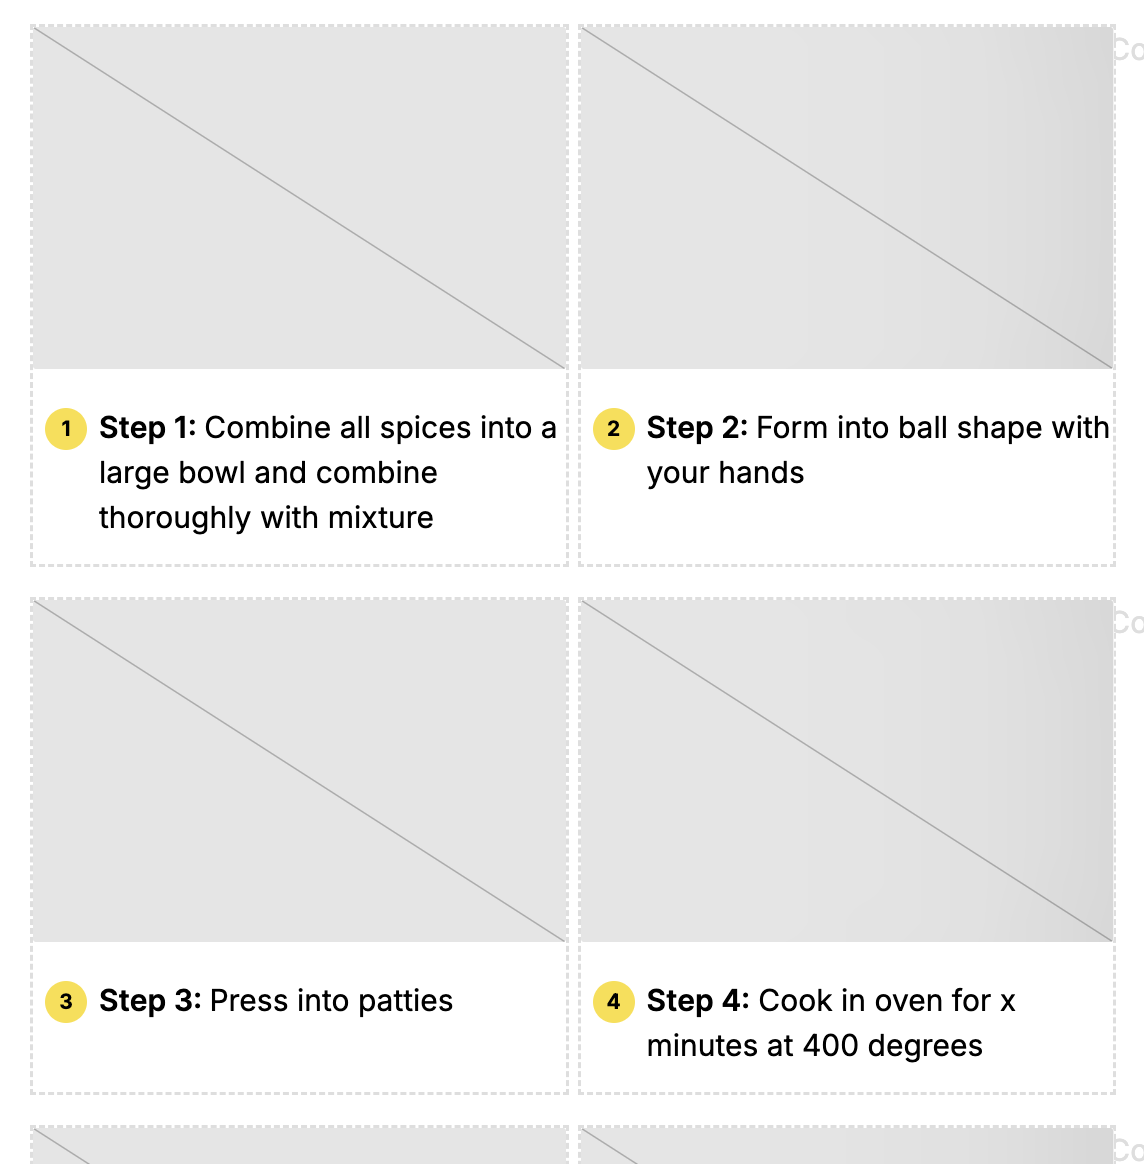
If you need more than 6, simply copy the "Column" and paste it below. You can then set custom start values on each list.
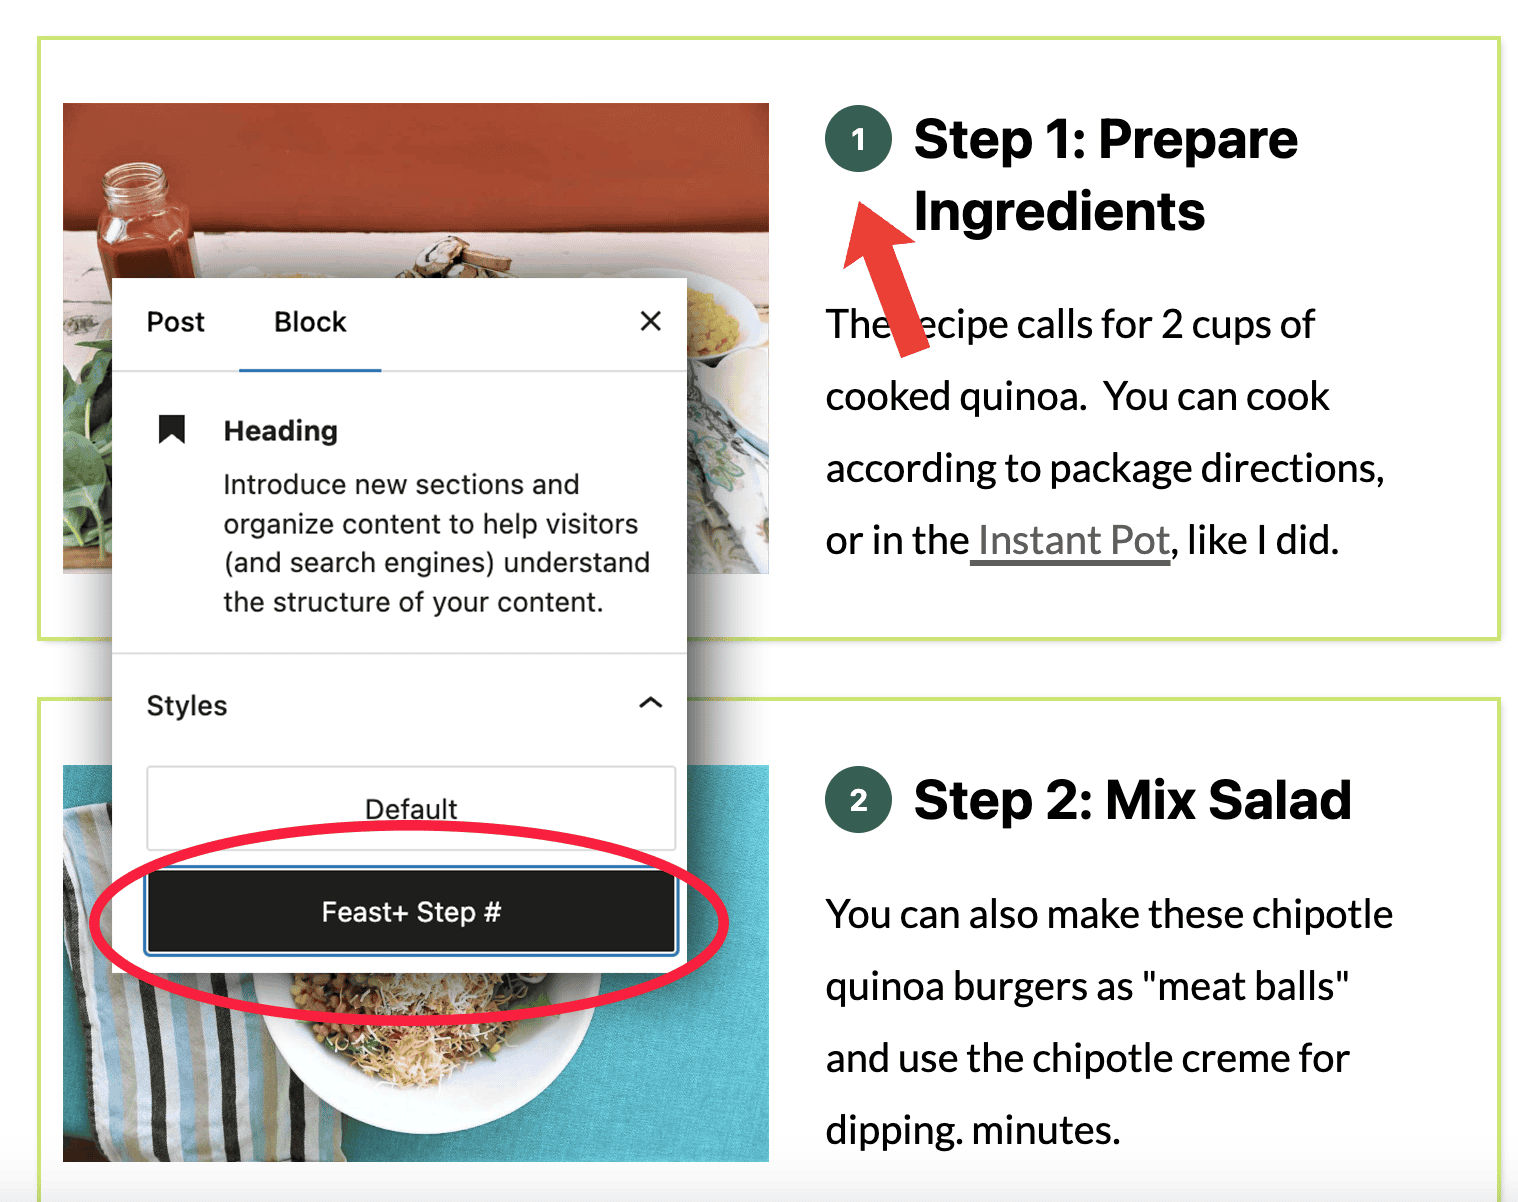
Numbered Step Headings
In addition to the instructions patterns, we've also added the ability to add large numbers next to headings. This is great if you have more comprehensive step-by-step instructions that you want in their own sections.
This gets applied by selecting the Heading and then selecting Feast+ Step#.
These numbers will be automatically applied in sequential order; you do not need to set each manually.
You can find this block pre-formatted in the Block Editor > [+] > Patterns > Feast Post Patterns > Instructions Pattern Horizontal
To set the color:
If you haven't already set it, you can set the color for this in your Feast+ branding page under "Custom List Styling". This is a new option as of April 2025, so it may not be selected.

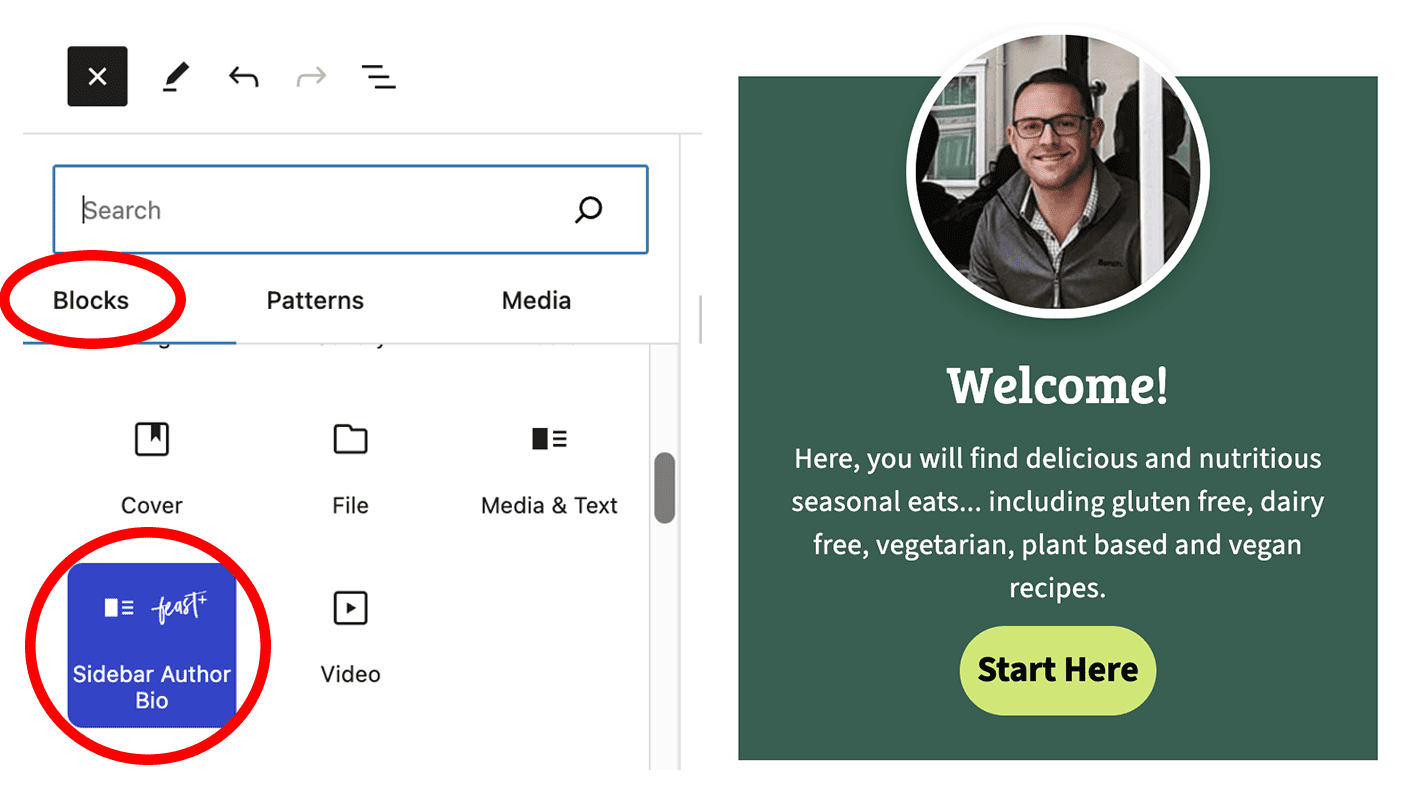
Sidebar Author Bio
In the Block Editor > [+] > Blocks > Sidebar Author Bio you'll find a pre-defined layout for adding a sidebar author box.
Separator Styles
We've added 4 custom separator styles to pages! These pull in your Feast+ Accent color.
Separators should only be used on pages, not on posts.
You can select any existing separator and change the style, or insert a new one through the Block Editor > [+] > Blocks > Separator > Block > Styles > Select your style
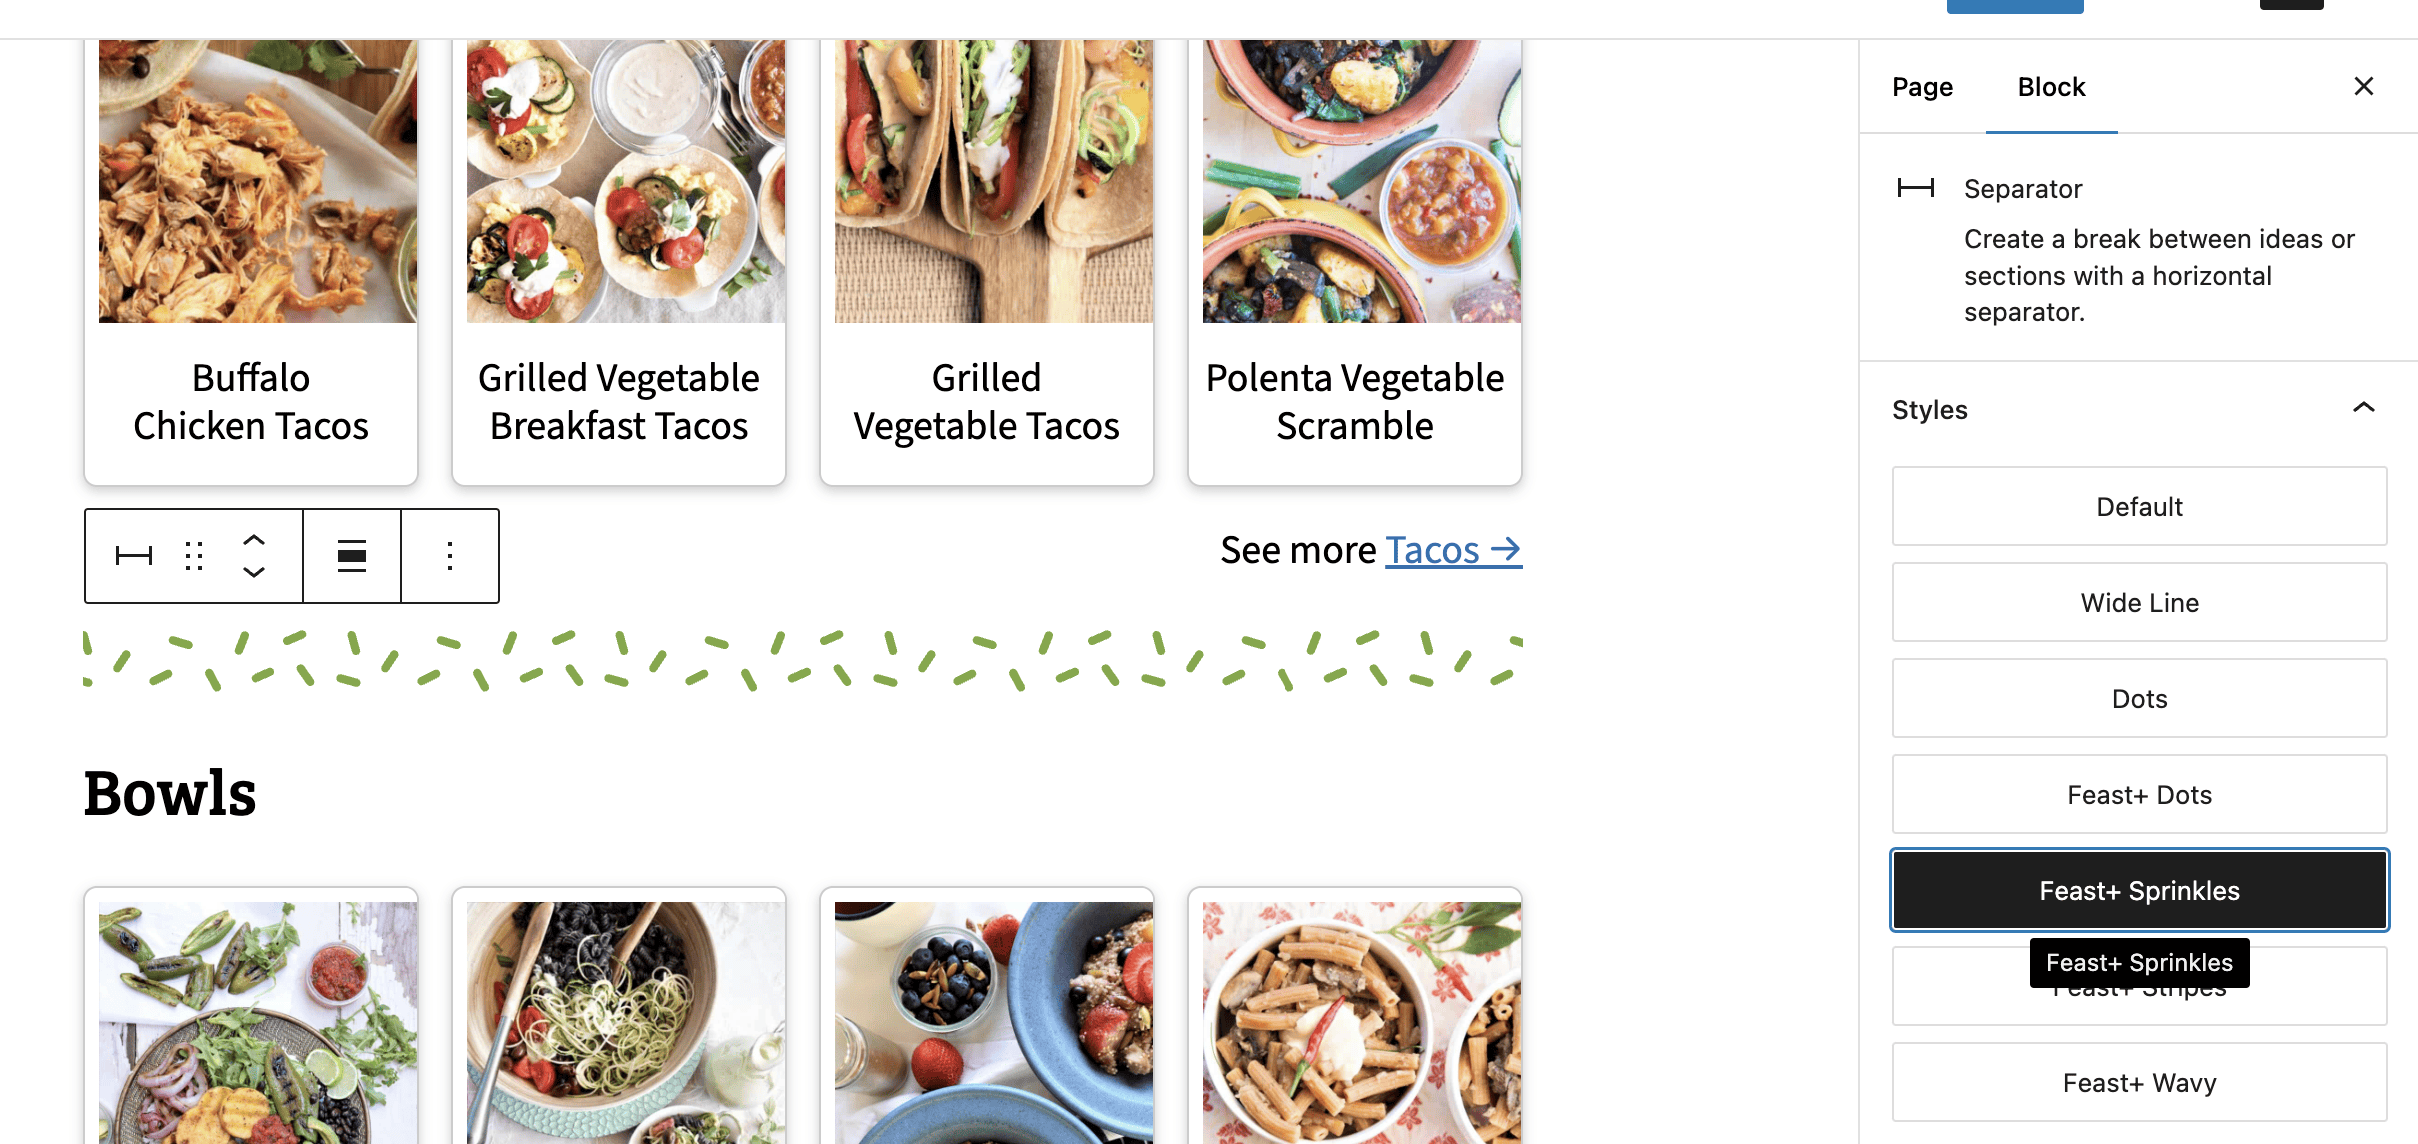
Separators are meant to help you create visual hierarchy amongst sections for your pages. We recommend using them to separate two white background blocks.
Top 10 Styling
We've added the ability to add fun numbers to any FSRI block. To enable, go into the FSRI block and enable "Top 10 List" styling.

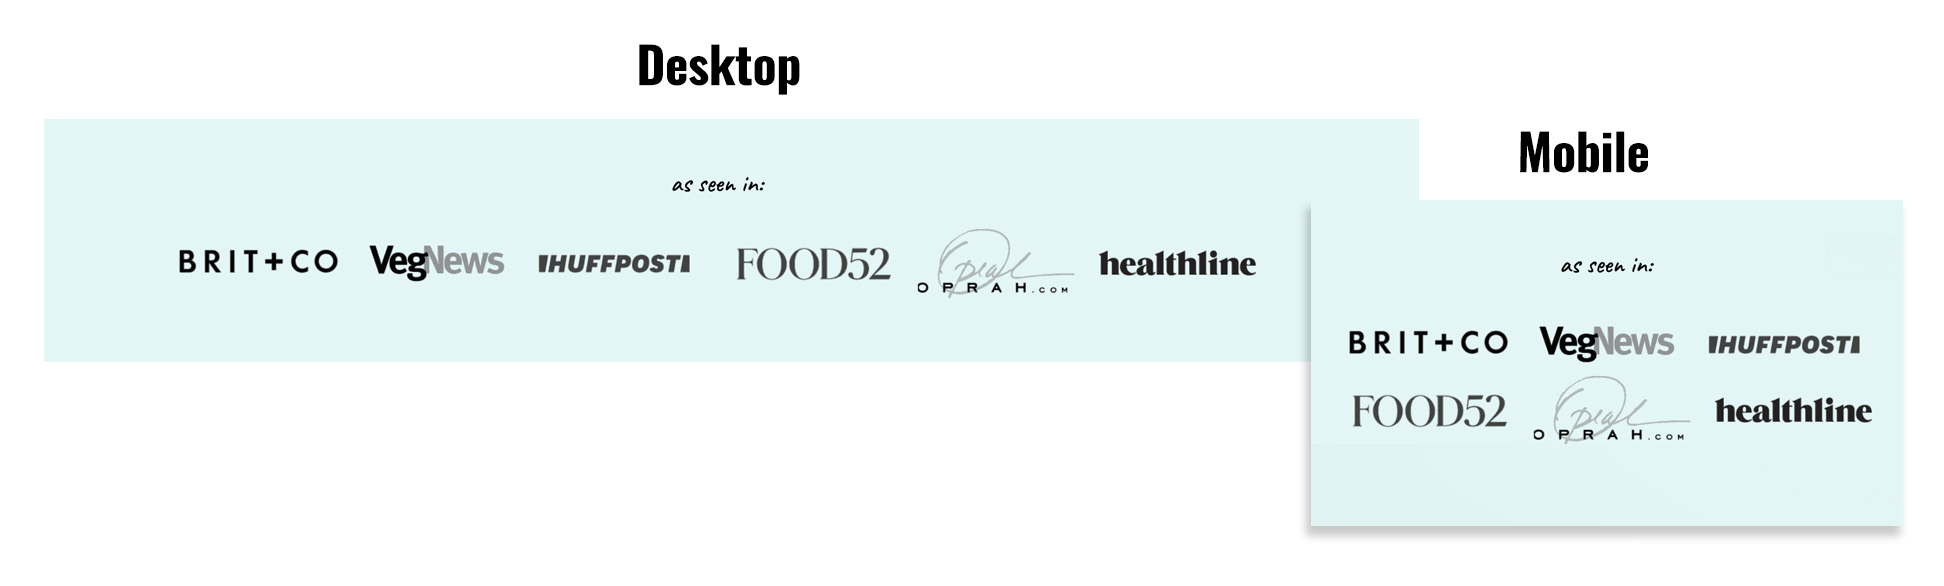
As Seen In Pattern
We've added a new "as seen in" pattern for featured logos. This is recommended to increase authority. Use a free backlink checker to help find notable sites that have featured you.
To insert:
- Go to Block Editor > [+] > Patterns > Feast Footer Patterns > As Seen In
- Insert two separate 750x100px images, each with 3 logos. If using Canva, you can use our template and save them as transparent .PNG files.
By using this template, they will display horizontally on desktop but stack in a 3x2 grid on mobile.
To turn the logos from color to black and white, follow this tutorial:
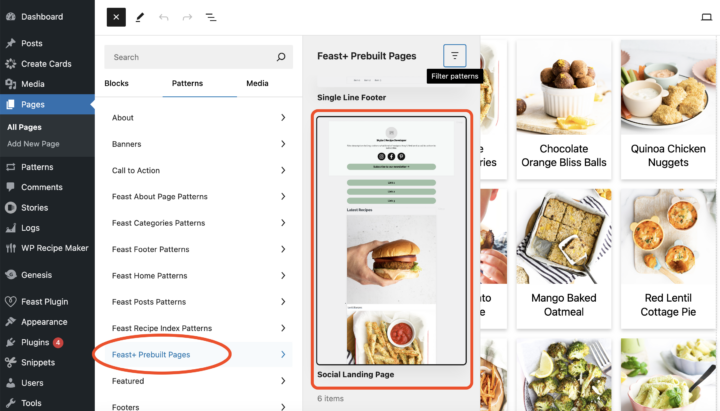
Social Landing Page (Link In Bio)
- To insert, create a new page on your website called "social" or "links".
- In the Block Editor > [+] > Patterns > Feast+ Prebuilt Pages > Social Landing Page you'll find a pre-defined layout for creating a page of social links.
With this new feature...
- ???? You can save money and cancel your link in bio subscriptions.
- ???? You can earn revenue on ads since the landing page is on your actual site.
- ???? Users can use your built-in search bar to find content.
- ???? You can pull in the latest posts automatically (no manual updates!).
- ???? Feature top products or call-to-actions.
Top of Site CTA
For a more visual call-to-action at the top of every page, we've created two compact blocks you can use. These appear just below the header (but are not sticky) and act as an alternative to the Top Banner in the Feast+ settings. They're great for adding a secondary CTA and can also be reused in other areas of your site.
- Feast Plugin > Feast Layouts > Add New Feast Layout
- Name it "Below Header CTA"
- In the dropdown on the right side, select "Full Width Banner"
For a text-only CTA like this:
Join my free newsletter!
Go to [+] > Patterns > Feast Home Patterns > Skinny Call to Action. Add your text/links and hit Publish.
For a visual CTA like this:

Enter your call-to-action text here.
Go to [+] > Blocks > Feast CTA. Add your text & image and hit publish.
You can add a 800x490px image or use our Canva template here.